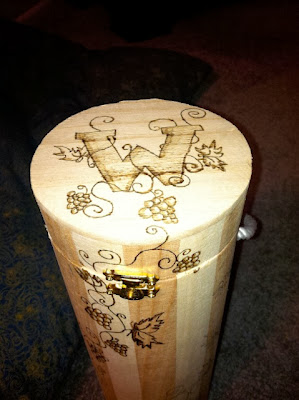
I got totally into wood-burning about a year ago. On this blog there are a couple of examples of my work and little tips and tricks that I found out in my playing with wood-burning.
I got this wood-burning tool and any tips I offer are associated with this tool considering it is the only one I have used.
These are tips and tricks for beginers
I bought all my wood at Michael's Craft store.
Some of the wood I used:
A slice of tree with the bark still on
A wood bangle bracelet
A frame
Finished wood plaques
Wine bottle holder
I noticed that this wood burning tool did much better on smaller projects. I feel like the tool could not sustain high temperatures for a long time, so residue would build up on the tip of the burning tool and I would have to turn off the tool and scrub off the residue before I could continue with my project. Possibly, I should have bought a more expensive tool, but I didn't know if I would enjoy burning.
I found that softer/smoother woods were better than rough/knotty wood. The burner would get stuck in any inconsistencies and cause dark spots in the burn.
I learned that I had to draw what I wanted to burn on the wood with a pencil first. When i tried to freehand the burn it was a disaster. I would even print up templates from the internet and then trace it on the wood with tracing paper.
This wine bottle case was one of my favorite burns. People love wood burnt gifts. They aren't supper hard, but look expensive. Give it a try it's fun!
PS. A lot of my wood-burning inspiration came from this artist.


